Create Bulk Users (Import) in Active Directory
Description
Section titled “Description”The Create Bulk Users tool lets you easily mass import user accounts into Active Directory from a csv file. You can import a single account, 100 or 1000s at once. You can also export accounts from one domain and import them into another AD environment.
Features
Section titled “Features”- Import users from csv
- Included csv template with 34 user properties (you can add more if needed).
- Add users to groups
- Import into an OU
- Set manager
- Set name format
- Require password change at next logon
- Create your own csv templates
- Set proxyaddresses
- Enable or disable accounts
How to Bulk Create Users
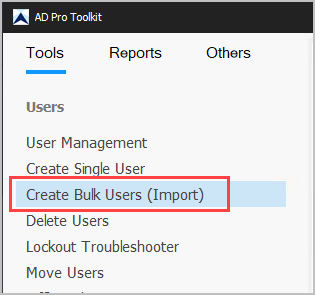
Section titled “How to Bulk Create Users”Step 1. Click on “Create Bulk Users (Import)
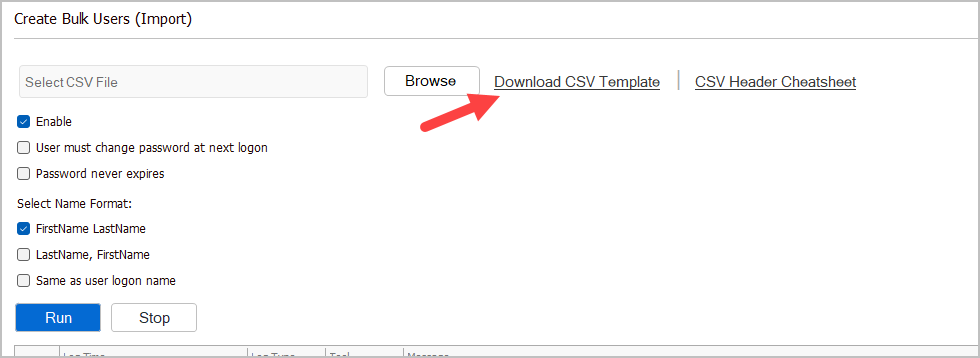
Step 2. Click on Download CSV Template
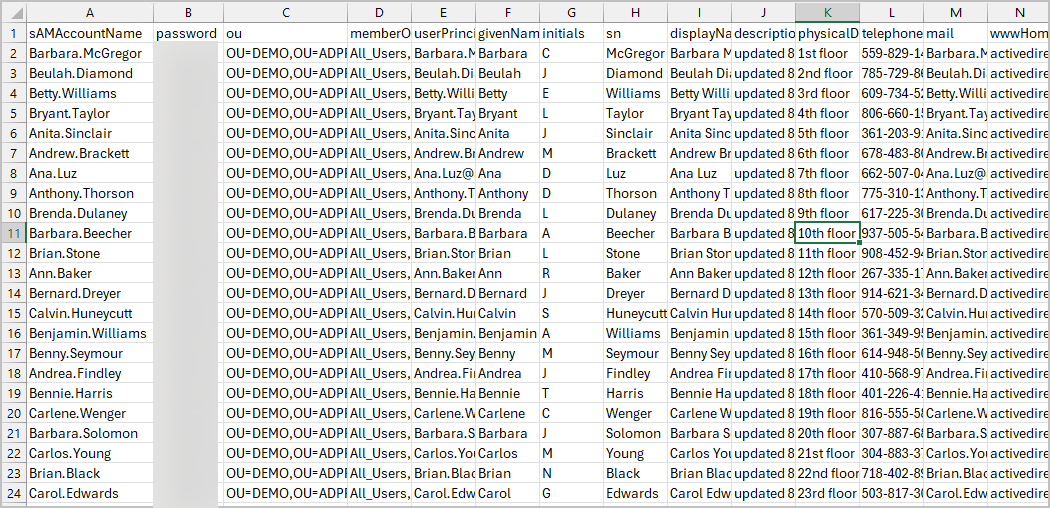
Step 3. Modify the CSV template with details about the users you want to create.
Required Columns:
- SamAccountName = This will be the users logon name.
- password = users password. Make sure it meets your password requirements.
- givenName = First name
- sn = Last name
CSV Example:
Save your template.
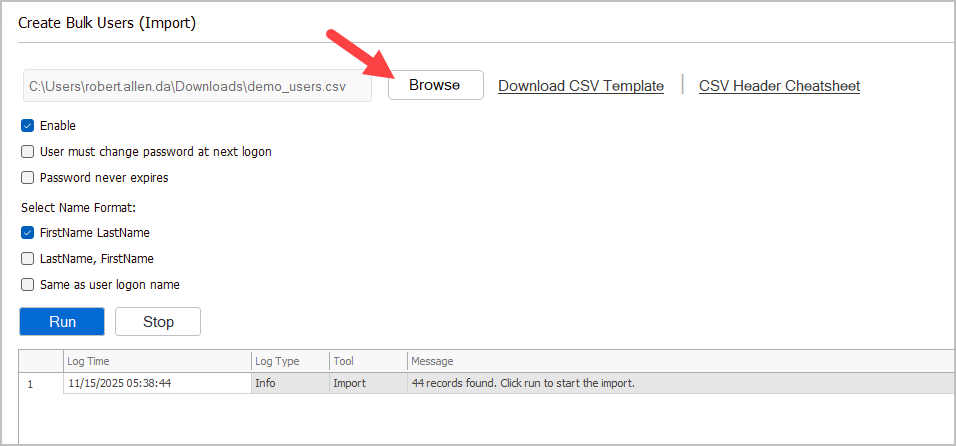
Step 4. Click “Browse” and select your csv file
Step 5. Select Import Options
- Enable: This will enable or disable the account when it is created (enabled by default)
- User must change password at next logon: This option will require users to change their password at first logon.
- Password never expires: Set the user account password to never expire
- Name format
- FirstName LastName: Sets the name format to FirstName + LastName
- LastName, FirstName: Sets the name format to LastName, + FirstName
- Same as user logon name: Sets the name format to logon name (samaccountname)
Step 6. Click “Run”.
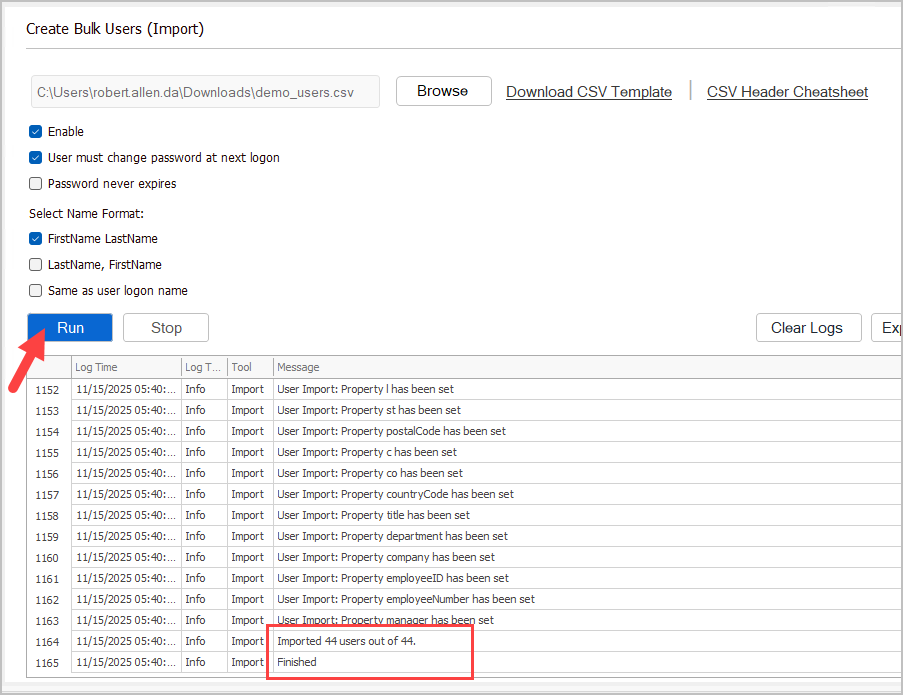
Review logs to verify that all account imported with no errors.
Add Additional Attributes to the CSV
Section titled “Add Additional Attributes to the CSV”You can add additional user attributes to the CSV file; you just need to know the LDAP name. You can find the LDAP name by opening the attribute editor in Active Directory Users and Computers. You could also use PowerShell to list all user account properties.
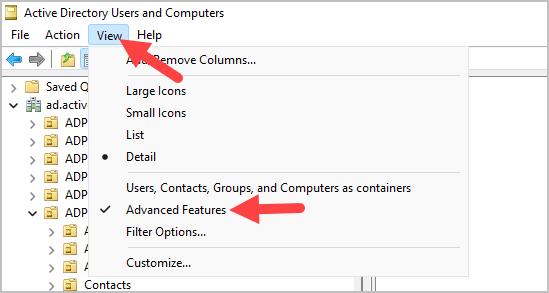
To see the attribute editor, you first need to enable the advanced features in Active Directory Users and Computer
Step 1. Click view from the top menu then select advanced features.
Step 2. Now when you open an account you will see the attribute editor tab.
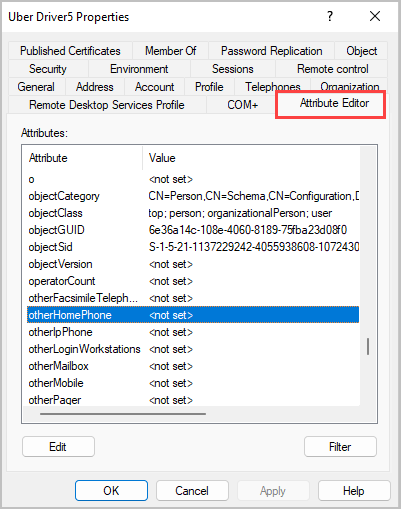
The attribute editor screen will show you all the user LDAP properties.
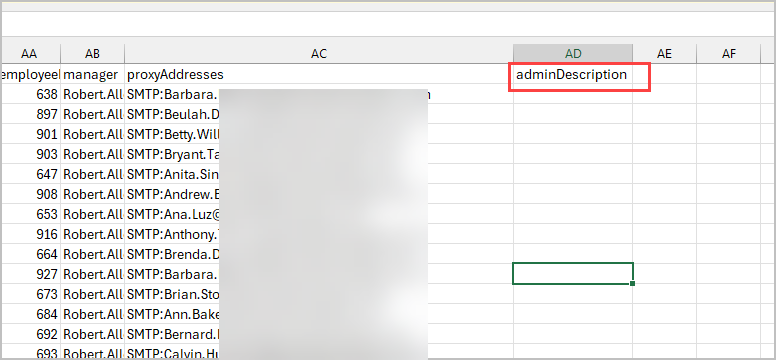
Step 3. Now just find the attribute name and add it to the CSV.
Example, I’m adding the adminDescription attribute to the csv template.
All done. That is how you add additional attributes to the CSV file to import with new accounts.
Supported Attributes
Section titled “Supported Attributes”The csv file uses the LDAP name which can be different than the fields you see in Active Directory users and computers.
For example, in the csv to set the users First name you would enter that in the givenName column. Below are some screenshots that show the ldap to Active Directory names.
General Tab
Section titled “General Tab”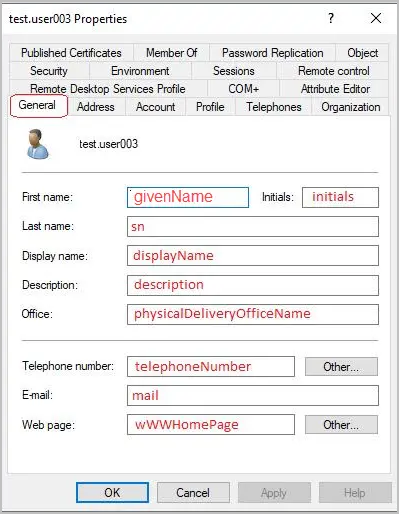
Address Tab
Section titled “Address Tab”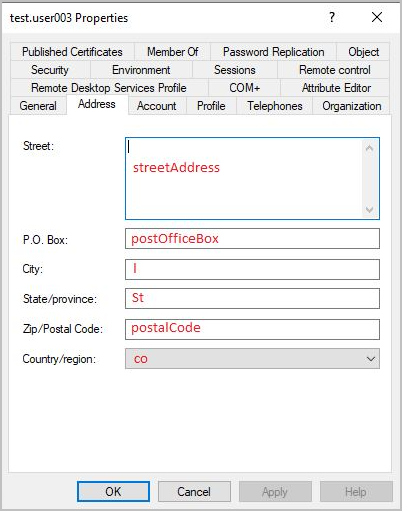
Account Tab
Section titled “Account Tab”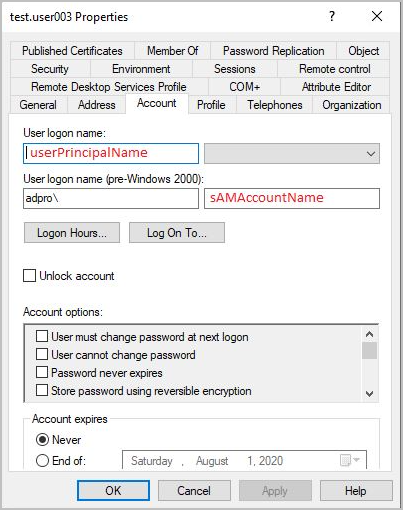
Profile Tab
Section titled “Profile Tab”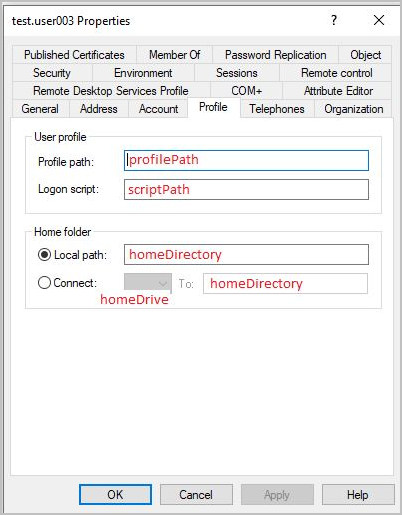
Telephone Tab
Section titled “Telephone Tab”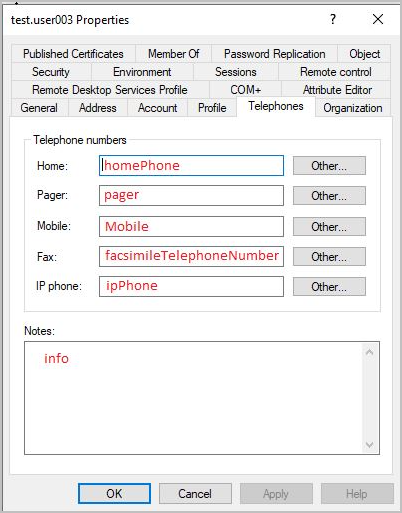
Organization Tab
Section titled “Organization Tab”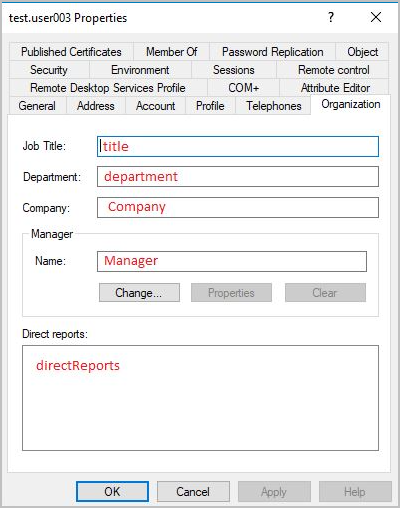
Attribute Table
Section titled “Attribute Table”| LDAP Name | Active Directory Field | Description |
|---|---|---|
| sAMAccountName | User logon name (pre-windows 2000) | This will be the user’s logon name |
| password | N/A | The user’s password |
| ou | N/A | The distinguishedName of the OU to import the user to |
| memberof | (Group membership) | The groups you want the user added to |
| userPrincipalName | User logon name | The user’s logon name in email format (user@domain) |
| givenName | First name | The user’s first name |
| initials | initials | The user’s initials |
| sn | Last name | The user’s last name |
| displayname | Display name | The user’s full display name as shown in AD |
| description | description | The description field on the General tab |
| physicalDeliveryOfficeName | Office | The office field on the General tab |
| telephoneNumber | Telephone number | The user’s primary telephone number |
| The user’s email address | ||
| wwwHomepage | Web page | The user’s web page/URL |
| streetAddress | Street | The user’s Street address on the Address tab |
| postOfficeBox | P.O Box | The user’s P.O. Box number |
| l | City | The user’s city on the Address tab |
| st | State/province | The user’s state or province |
| postalCode | Zip/Postal Code | The user’s postal or ZIP code |
| c | Country | The user’s country code (e.g., US, CA, GB) |
| profilePath | Profile path | Path to the user’s roaming profile |
| scriptPath | Logon script | Logon script executed when the user logs on |
| homeDirectory | Home folder > local path | The path to the user’s home directory |
| homePhone | Home | The user’s home phone number |
| mobile | Mobile | The user’s mobile phone number |
| ipPhone | IP phone | The user’s IP/VoIP phone number |
| title | Job Title | The user’s job title |
| department | Department | The user’s department |
| company | Company | The user’s company name |
| employeeid | N/A | A unique employee ID number |
| employeenumber | N/A | Another employee number field used by some organizations |
| manager | Manager | The logon name of the user’s manager |
| proxyAddresses | N/A | Email aliases and proxy addresses (e.g., SMTP:user@domain.com) |